First step is to get inspired, for this I look at film, game, 3d, 2d art, anything to get that first idea of how I want things to look.
After I know a direction that I want to take the design and look in I go about creating one modular piece which will set this design for the rest to follow, normally this is a straight wall piece.
So after looking at research I create some concepts, for this I use 3ds max cause one I am far quicker in 3d than 2d and I can rotate around the asset to get better angles and alter shape quickly. There are times when I will do quick drawings with a tutor or class mate to discuss an idea but more often than not these sketches are turned into a 3d model in minuets.

These are the five concepts I modeled, these are like the thumbnail equivalent when ever I do 2d concepts. At this stage I ask myself and others for feedback and decide on changes and finally which one I will take forward to the next stage.
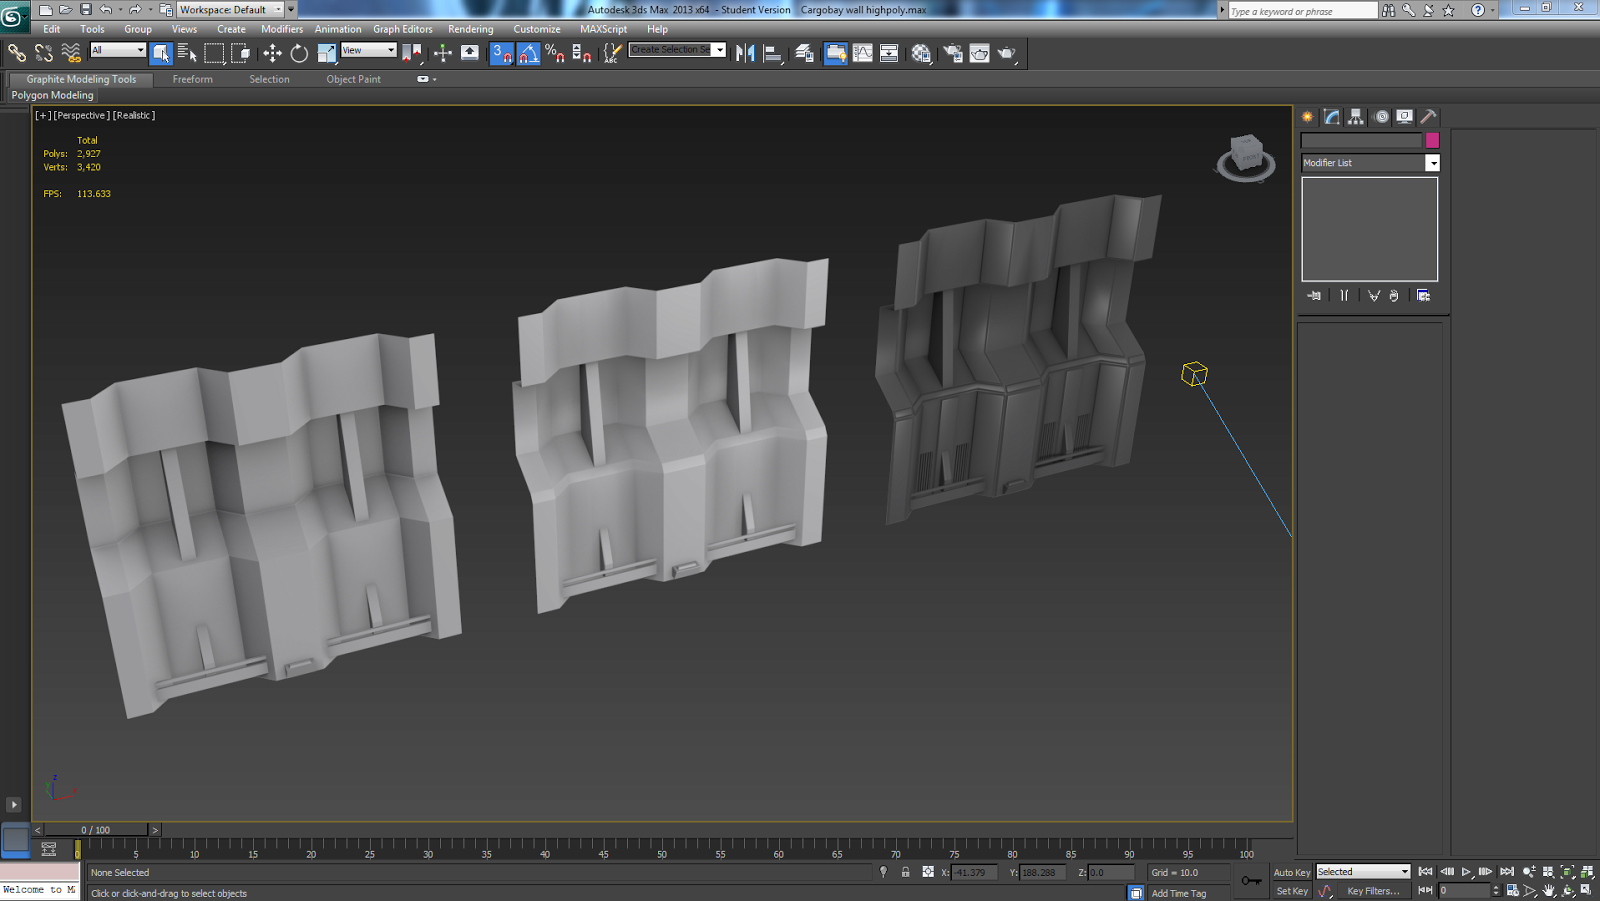
So the next step is to begin working in detail to the model. The object on the right is a high poly version build up from the basic block out. This is how I plan which areas have detail and if I can repeat any of this detail saving space when I begin to create the texture.

This image shows how I plan a modular texture out. I covered this in another post about how I create them so I wont go into to much detail here.

From the layout I begin to model the panels giving them depth and shape.

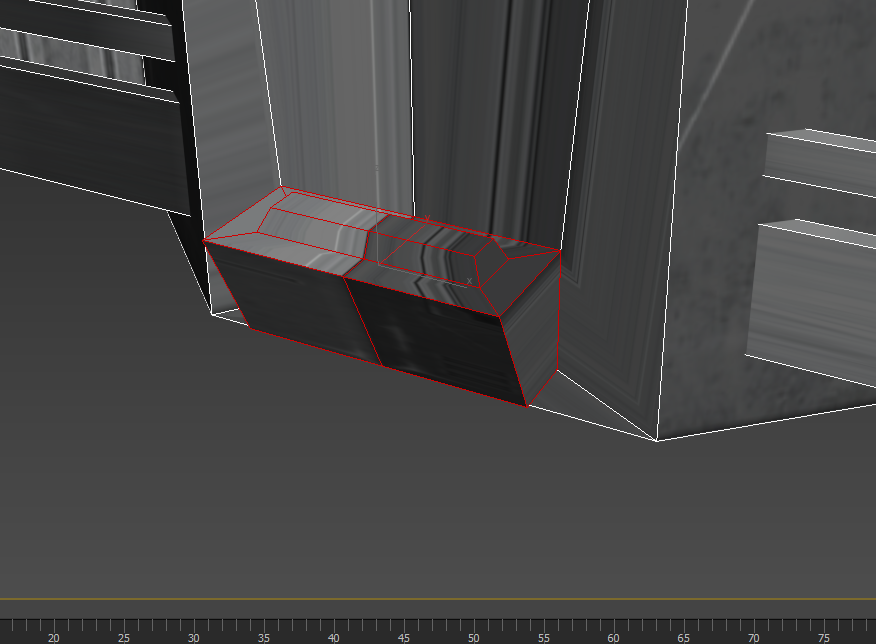
Here's a close up of the topology.

After I am happy with the layout and how the panels look I add more detail like this.

Notice that I don't model the detail onto the existing mesh. I do this for two reasons. One I don't need too, if I did all I would be doing would be adding loads of loops and it could get messy, and two if I don't model the detail in I can change or delete it when ever without having to push and pull vert's about.

Then I go over the model again this time I add even more details.

And like before these are place in front of the other objects.
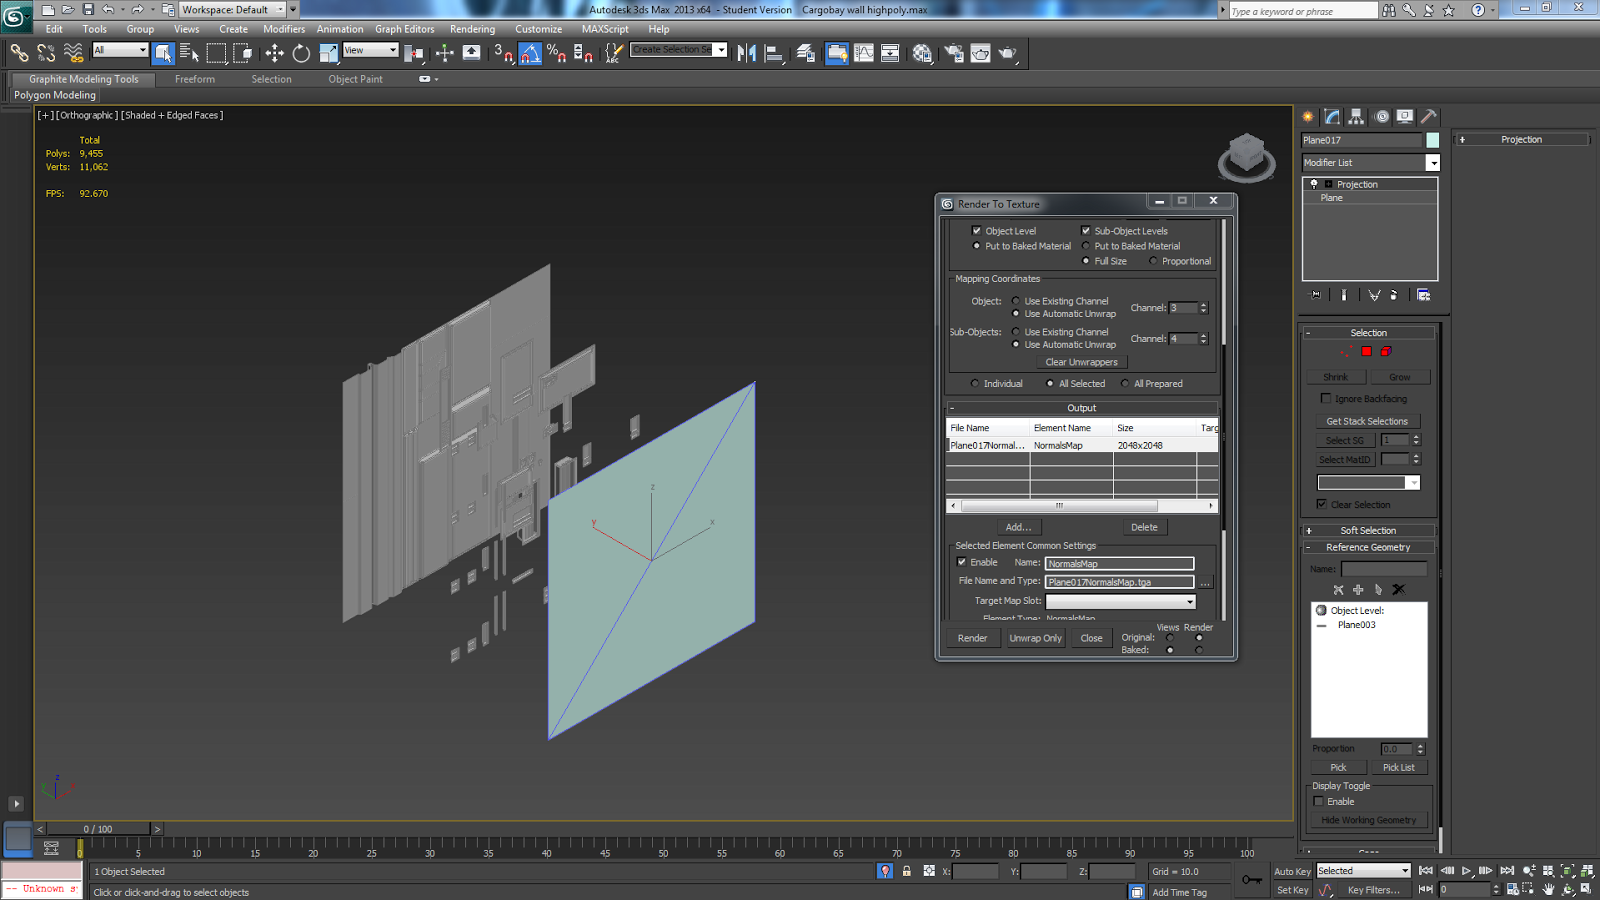
Next its time to render out the normal's. I use the render to texture with a plane placed in front of the objects.

Now here you can see a error with the render. In this case I am not bothered because the error appeared on a flat bit of the texture which doesn't require normal's. This error happened because when picking the objects to include in the render to texture I missed a panel (seen on the far right, pointed at by the red arrow).
These and other errors are shown as bright red in the render window. Now again its good to note that what appears in the render window will not be what is saved if rendering normal's. On the far left is the normal that came from the render, you can see a pinkish rectangle on the left, now since I haven't any detail to be baked into the normal's here I will touch it up in Photoshop by fill colouring over it.

Now this is where my texture creation method has changed from the previous blog post. Before I would either render a Diffuse from max and merge it and a Occlusion render to create a base layer to paint on, but I found that I could get much nicer specs and diffuse maps from crazy bump.

Here I am tweaking the spec and diffuse map so I can get the maps to paint onto. Once done I save all maps, even though I wont be using the displacement map.

Here you can see how I create a diffuse texture. I have a template document set up from when I redid all the texture maps. In the template there is a layer with metal and grime on this overlays the diffuse saved from crazybump and basically acts like shadow and a outline to paint details on.

The first part of creating the texture is adding the colour layer, this just adds more variety into the texture (although its still pretty grey).

Next is to create another layer and paint in scratches and paint chips. I create these on a separate layer cause I use that layer again in the spec map.

Here is the spec from crazybump. There is a grime spec layer above the layers to add the uneven shine to the metal.

I copy the scratch layer over from the diffuse and add it to the spec. Next I play with the levels of the map from crazybump so the grime and scratch layers stand out.

Next is to save all the maps and import into UDK and into the correct place in a package.

Next I set the material up, the material is very basic and I made sure if has the same spec set up as the other textures I use.

Now that the textures are done and material has been set up its time to model and unwrap the asset. Here I have imported the concept piece the model is fairly clean and with only some slight tweaking fits perfectly to the modular grid the rest of the scene uses. Sometimes I may be required to completely remodel a wall piece.

Now I have the model its time to unwrap it and fit parts onto the texture. So I create a new material in Max and import the diffuse.

Here's what the texture looks like on the model without a unwrap.
It is here that I notice something, this little light. Now I need light fixtures in the scene somewhere but if I kept this on the mesh I could change my mind about its position later in UDK. For this reason I have taken it off.

I did this with the target wield with vert's selected.

Now its time to unwrap. I load the texture onto the uv mapping space. This help position the faces.

Bottom half of the asset unwrapped.

Fully unwrapped. As you can see some areas overlap on the texture more than once. And that's one modular piece down.

Here's some more pieces modeled and unwrapped from the same texture, very efficient.

Imported the assets into UDK, now I can begin placing them.

Add some other asset to dress the room and wall pieces and that's another modular room that shares one texture.
I find that this workflow to create modular pieces to be very quick now that I have practiced and optimized my workflow it has become even faster. The over all outcome is good to, however as I found with the whole of my Hons there is one downside to the rooms sharing one texture. That its hard to get variation and break bit of the scene up. To break bits up I can use other tweaked materials or material instances to adjust elements of a master material. This is something I will have to learn and implement in future project and environemts.
No comments:
Post a Comment