In my environment I have two kinds of wires. Some wires are created from several assets which fit together to give the appearance that its a continuous cable, these 'modular' wire pieces are efficient for placing many of them and creating detail but sometimes a corridor or room would benefit from a unique asset.
Am talking about a cable which might fold over a railing or twist and turn down an entire corridor, this could be done with a set of wires but it would take a fair bit of planning and may still look a bit 'placed'. So heres how I create large wires for my environment.

Heres a section of the corridor placed exactly like it is in the UDK map. I kept the floor tiles in because this is where I want to have the cable run, I also added a few wall pieces so I knew how close I could run the cable up to the wall. There is another cable already in the scene, this cable is one I created earlier.

So the first step in creating a cable is to use the spline tool. But before this I need to set Max grid snap to snap to faces and turn the tool on. This allows me to place the splines points easily on the faces in the scene meaning that if I wanted the cable to run over another cable or raised asset I simple make sure there's points running over its faces. I can explain this a bit better later on.

Now that snap to grid is sorted out its time to create a spline. This is done by selecting the 'shapes' button on the create tab, from here I select 'Line'.

With the 'Line' tool I can draw splines but with the snaps enabled I am able to draw (snap) onto faces. In this step I am simply laying out a rough shape for the cable to follow, it doesn't matter if some parts of the spline are harsh corners or look pointy this is fixed later.
This is a better point to explain how the snap to faces can help, if you look at the top right of the image above you can see a green triangle this is the cursor and then there is a highlighted face outlined in green too. If you look at the point where I overlapped the existing cable you can see that there is a placed point on the top of it and two either side. This will help later when the spline is smoothed.

Well I have placed the spline where I want the cable to run. Now its time to round those harsh angles and make the cable flow and look a bit more like a cable. For this I am going to filet. So first thing I need to do is go to vertex select, in this mode I can select all, parts, or individual verts.

**important note, don't select and filet the two end points, all this will do it create two verts on top of each other and can cause a headache and mess later after using loft**
I selected roughly 5 - 7 verts and adjusted the amount of filet with each selection till I thought it looked rounded off enough, I did this along the entire spline making slight adjustments until I was happy.

Here you can see what a section of the cable looks like after filet, and how the spline raises and runs over the other cable.

Next step is to go back to the shape menu and this time create a 'Circle'. Think of this circle as a cross section of the cable, this means it diameter and how many sides the final cable will have.

Though it may be hard to see, above is three examples of different levels of Interpolation. Now this is a choice I plan ahead. Say if I know the cable is fitted on a ceiling or far enough from the players position I know I will be able to get away with having a four sided cable, or if the cable is going to be tiny. Like wise if the cable is on a wall and is player eye level it may be wiser for a higher detailed model, but still take into consideration the amount of times this asset is used as performance could become an issue later on. I know that I can create a four sided cable but with smoothing groups it can look round and smooth.
Something an old tutor said to me to remember that with "game development its all about smoke and mirrors and tricking the player" I apply this to environment creation and its used in games all the time.

Above is a screen shot I took from the beginning of Bioshock Infinite. The player is restricted to walking down one of these isles so the artist knew that to save on performance they could minimize detail in the distance. As you can see the candles in the foreground closest to the player are 3D models, however the candles further back in the scene are 2D planes which look like candles.

There presence on the screen however is small and so most if not all players will not stop and look at them and notice the fact they are just flat cut outs. I guess that's one of the joys I get now from wanting to be a environment artist I start to notice things like this... sigh. Anyway that's my explanation of how to plan and work out how much detail a model needs, or in that example if a model is even needed.

Now back to cables. Now we have a spline and a circle with a diameter and interpolation we favor so its time to and a Loft modifier to the spline.

After you apply the Loft, its time to pick the circle that you want to use for the cable. To do this find and click 'Get Shape' then click the circle you created.

Something like this will happen to your beautiful spline, don't worry the spline is still there just hidden this means you can edit the spline which will edit the loft real time if you need to. Now you may have noticed the large increase in Poly's in you Max scene, this is because the current loft is very high poly and detailed and frankly not suitable for a game asset in this situation.

To fix this take your eyes over to the 'Skin Parameters' tab and expand it. Here there are options to adjust the steps for both the shape (Circle) and path (Spline).

I knocked mine down to 0 for path steps which basically means it adds a loop to the cable on each of those splines verts. At this point you may want to lift the loft up slightly so its not half way sunk into the floor.

**important note, under all the loft options in the 'Suface Parameters' there's a Apply Mapping tick box. Tick it, you will save a lot of time later when unwrapping**
Now its time to check over the entire cable for errors or parts that haven't formed.
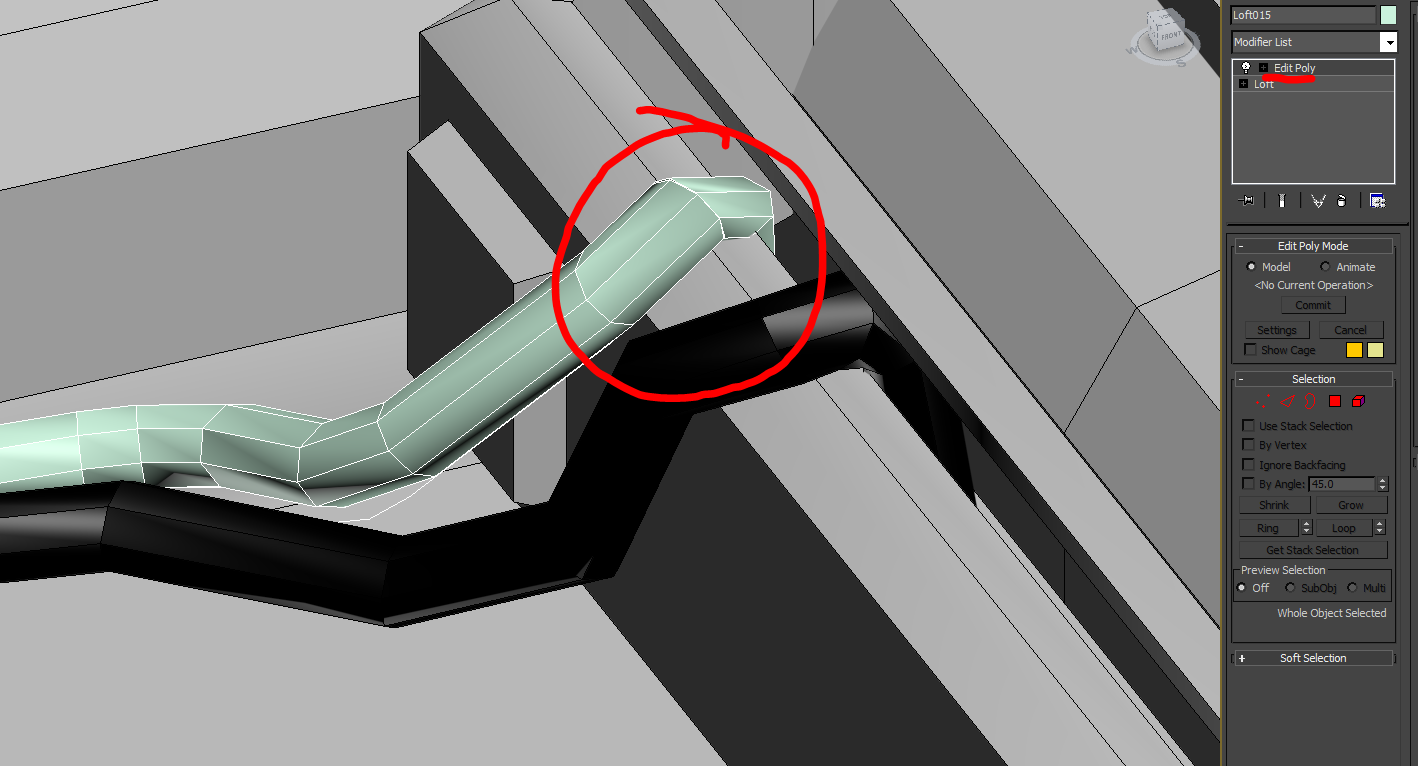
I have found a bit of the loft that looks ugly. First I added the Edit Poly modifier so I can edit the verts. Oringinally I was just going to rotate the loop about till I thought it bent over the asset correctly, however when zooming in closer I found that there was some messy topology. Luckily I noticed it now, its a easy fix.

First I selected all the verts of the cable, I could just select the area I know the error is in but this way I can fix other areas without having to zoom in on every bit of the cable, which saves time. So with all the verts selected I use the 'Weld' tool under Edit vertices. I used the settings box, the little grey box next to the weld button as it gives a bit more control on what your doing.

Here you can see that I have cut out more verts than the ones on this part of the cable, which must be other errors else where so that's good. With this value you don't want to set it to high or you will begin to weld verts that are just close but not so close that you can consider them a issue in the mesh.

Here's an after shot of the edited curve that's a bit more smoother and looks nicer.
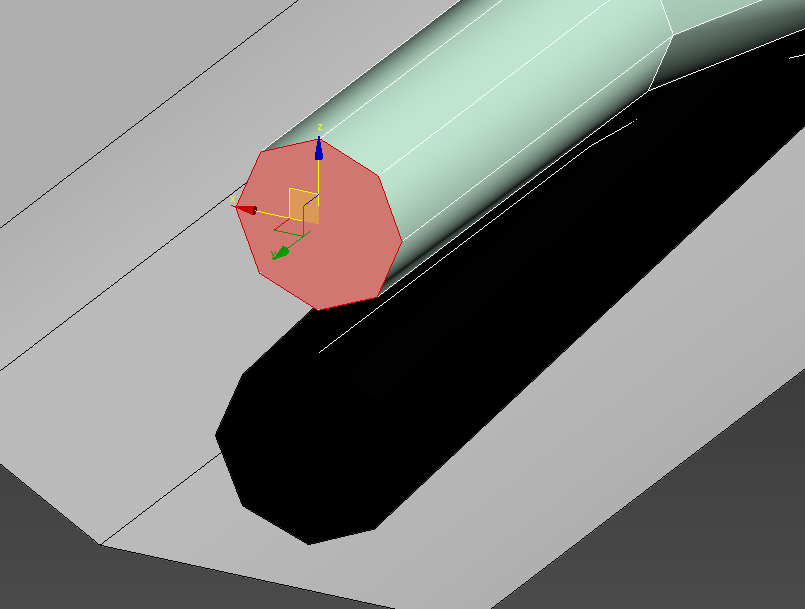
I also delete the two end faces so when the mesh has a smoothing group applied to the whole mesh it doesn't try to round the ends which would make horrible smoothing look, plus the ends aren't needed and in this case its saved me a whole 16 tri's!
Now at this point you will be nearly done with 3ds Max, last thing to do is to sort the unwrap out.

Here I have added a Unwrap UVW modifier to the cable. As you can see in the UV space the unwrap is squashed.
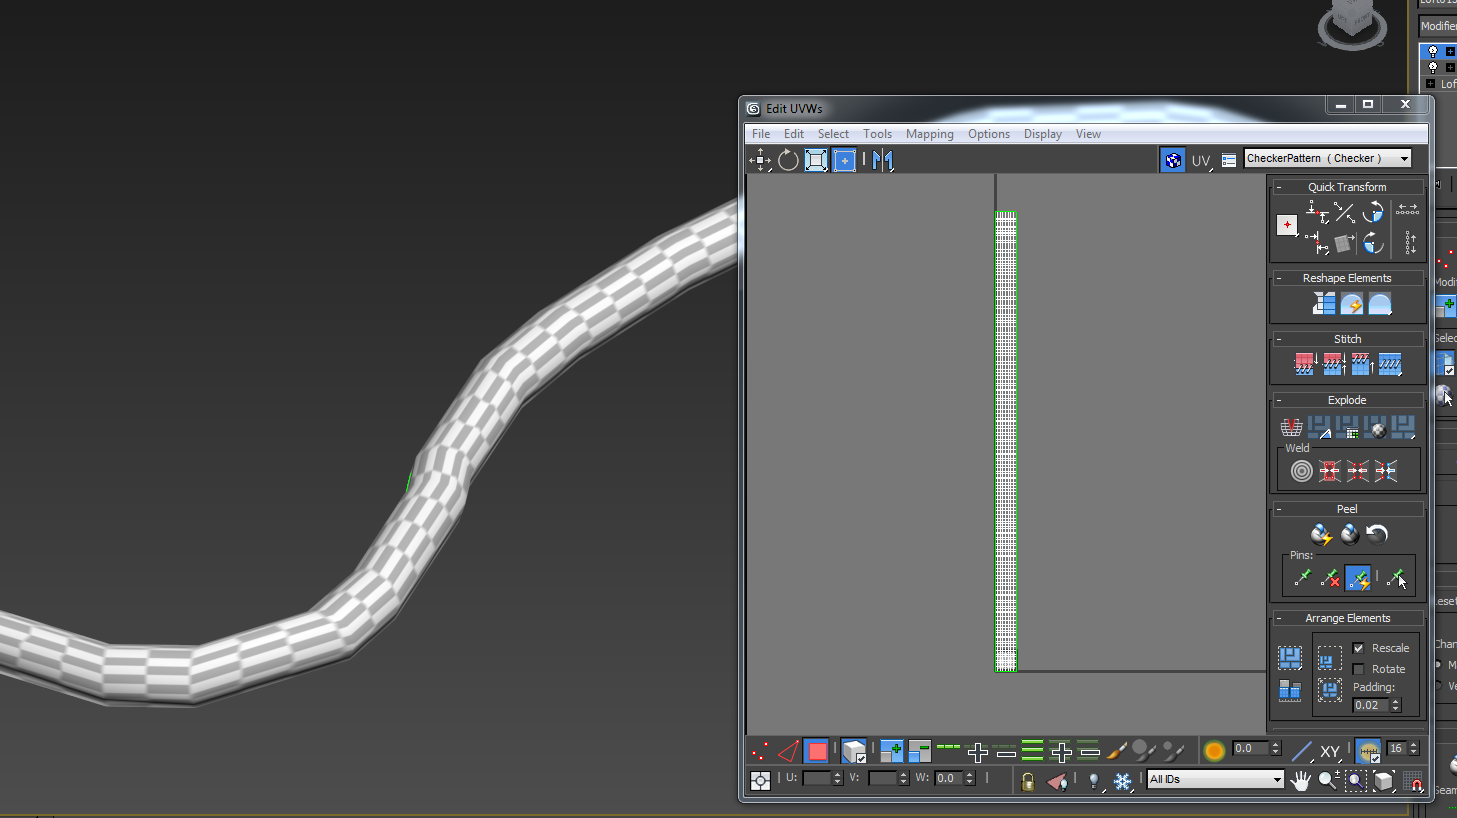
So as you can see I have just scaled the entire unwrap in one direction. Now the unwrap isn't stretched. But now the unwrap isn't all in the UV space, well this wont mater if we make a tile-able texture.
I wont do this in this post, so now its time to export the cable.

To export I normally need to use 'export selected' as I normally have other objects in my scenes. Remember to set a pivot point and center the object in the scene before exporting.

**important note, right clicking the arrows to the right of all the values shown when in 'select and move' mode and positioning an object will set them straight to 0.0**
When its exported correctly making sure that export smoothing groups is ticked and saved with a memorable name its times to switch to UDK. So I have imported the cable into UDK into the correct package and saved the package. Since I haven't made a texture for this cable I am just going to use a plain grey material.

All that's left is too place and position correctly in the scene, and that's it... of course I haven't covered lightmaps or made a texture but I think I covered the important other bits.
So that's how I go about adding a unique cable to an environment, and this could be applied to pipes, paths, air ducts, etc.
Awesome man!
ReplyDelete